
First Time Building a PC
My very first PC build from scratch. Technically, I do have another one that I picked out parts for back in 2012, but I just had the store assemble it for me rather than do it myself. Now that I finally have my own build under my belt, I feel a lot more confident tinkering with my old computer and being prepared to make upgrades to this one down the line.

I want to start off by giving Ben Stooke a huge thank you. He graciously lent me his time to select a basic list of parts for the kind of build I wanted, and also answered my endless stream of noob questions about all the different computer parts. Also, shout out to Liam Martin and Tyler Anderson, who have both built inside the same case and fielded concerns I had about airflow and choosing the right motherboard. Liam’s build in particular was my main inspiration for how I wanted my own to look (see the 3rd and 4th photos in the gallery below).
Putting together a PC in late 2019 is a lot like IKEA furniture. As long as you read the instructions and put everything together in the right order and in the right places it’ll all work out. The real stress comes from the fact all the parts are so damn expensive. A combination of poring over the included manuals, watching YouTube videos, and reading forum posts was what I relied on to be my teacher and guide during the whole process.

The box for my GPU had some nice subtle patterns on the inside of what could’ve been a very nice black shoe box. As per Ben’s expert recommendation, we decided to budget for a more powerful GPU and settle for a lower tier CPU. My expectation is to use this new PC primarily to take advantage of KeyShot 9’s GPU accelerated rendering, and be ready to handle any other GPU based rendering programs I might learn in the future.

I’m a sucker for spot gloss.

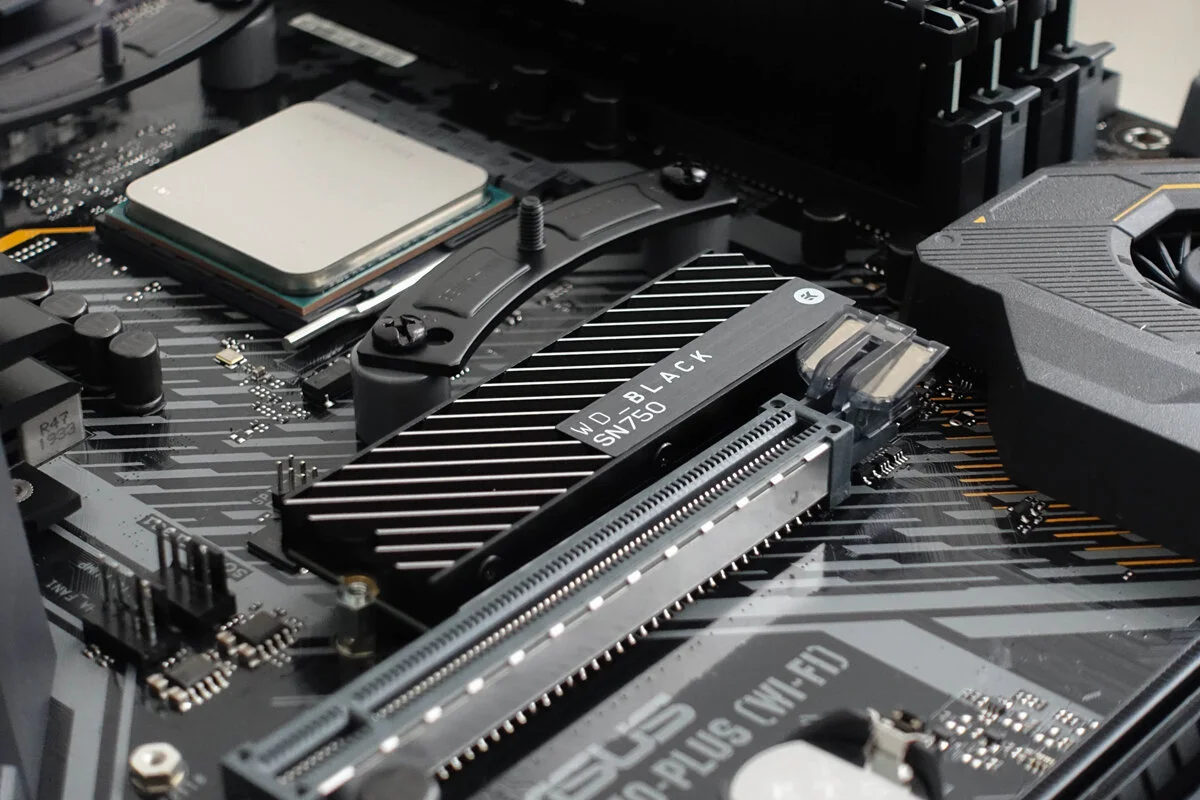
Been enamoured with these SSDs since I first saw them announced at CES (I believe that’s where I first saw them), it’s incredible to see it in person. The custom aluminum heatsink was designed by EKWB, a company I had never heard of before looking this up. The heatsink does make a difference in SSD temperatures, but not a significant one, it’s pretty much negligible.

It’s just too bad there’s not really any location inside the case to actually show off the design of this heatsink. It’s just for personal satisfaction
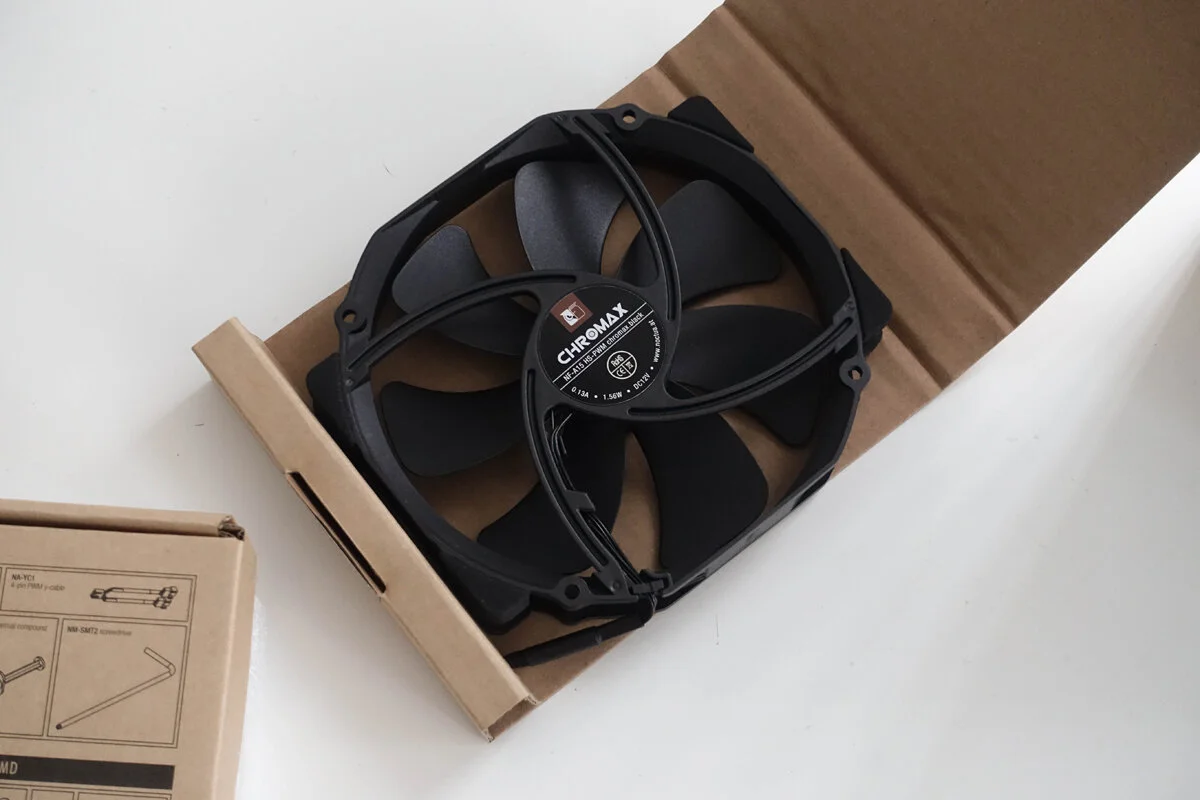
Splurged a little on other purely aesthetic choices such as these black Noctua fans, but I don’t regret the decision at all.


Beefy.

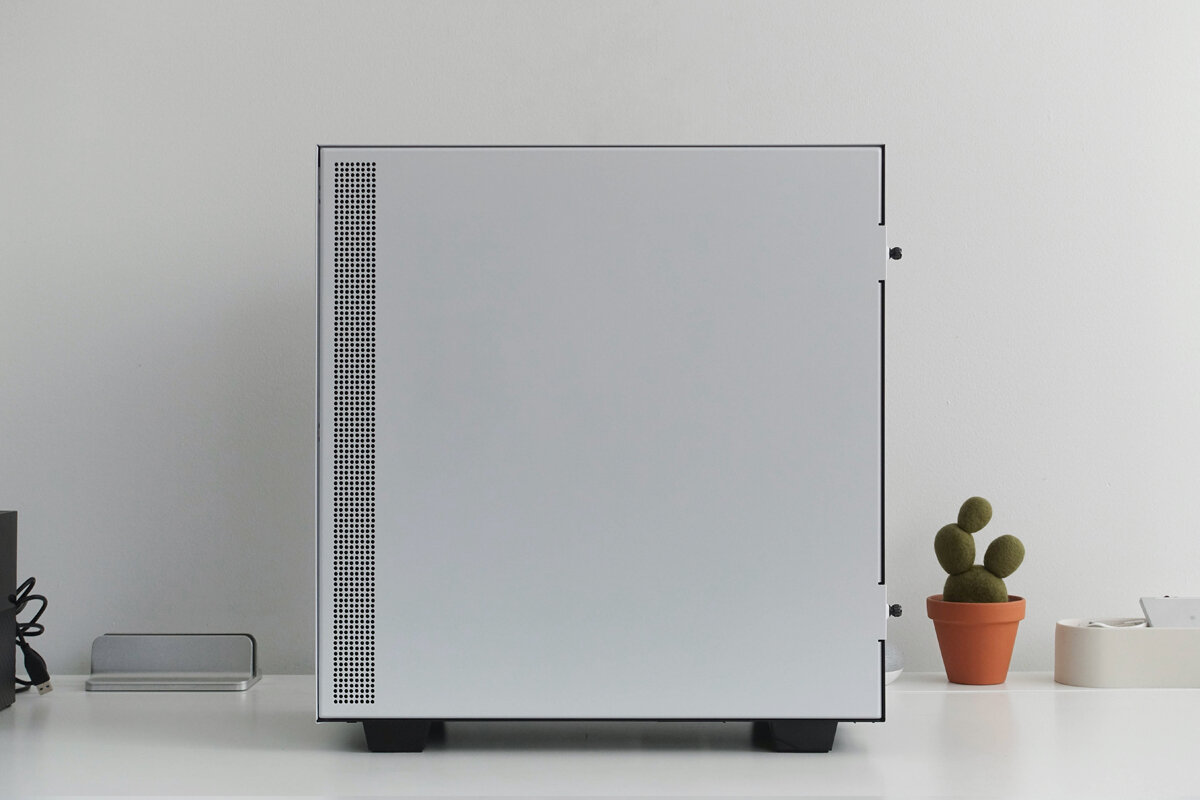
The NZXT H510 was pretty much the only case I ever really considered for my build. Nothing else really checks the same boxes as this one—perfect rectangular prism, monochrome, no gamer flourishes, no built-in RGB. Other than the lack of really good airflow, dare I say this the perfect case for designers.


One of the only two colour accents found in this case, and it’s just a removable sticker.

The other one is barely noticeable, but the plastic tongue usually found on the inside of USB-A ports is coloured NZXT purple rather than the usual blue. This being the only touch of their brand colour, with such a subtle application to boot has NZXT earning points in my book.

Removable cable bar.

Stock case fan.

More subtle branding.


The H510 comes with preinstalled motherboard standoffs, with the rest of the screws and instructions tucked snugly away in this box. I’ve got to detract points for the the quality of the preinstalled standoffs though, one was screwed in poorly at an angle and it wasn’t until a few good hits from a hammer that I was able to screw my motherboard in securely.

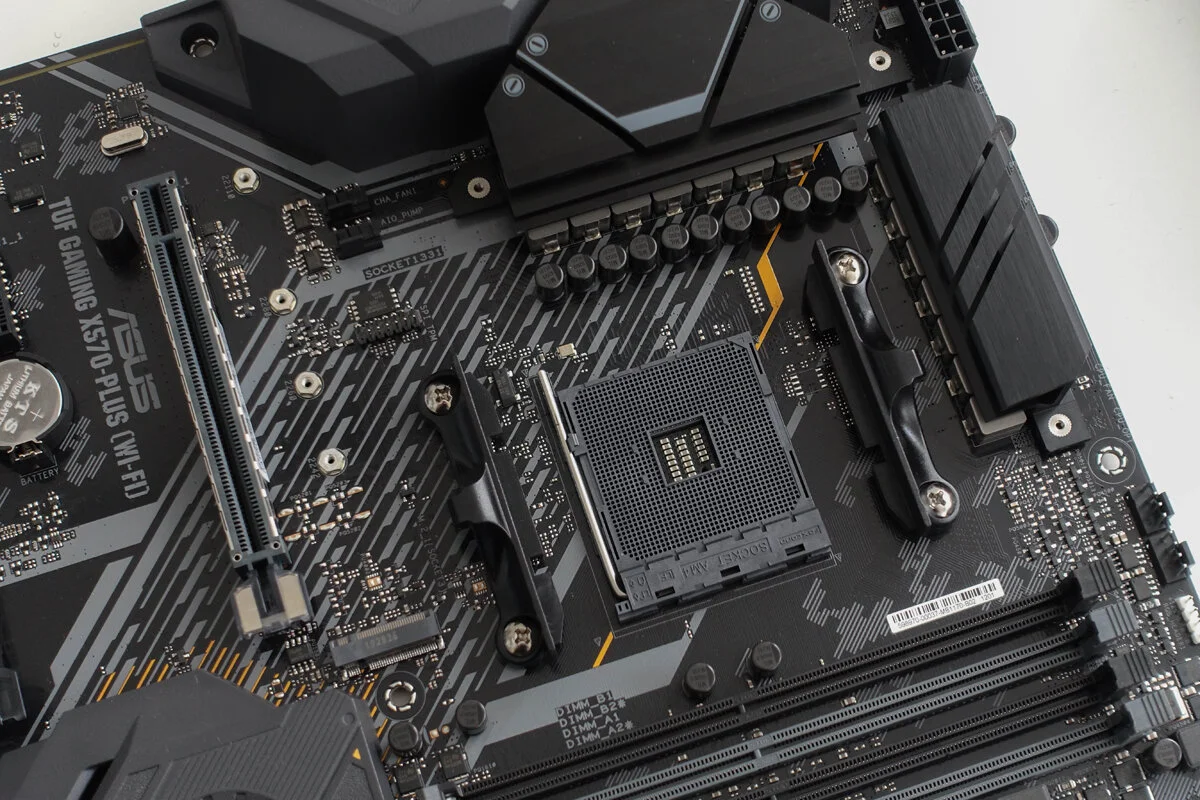
In the perfect world, this motherboard would’ve been black and white as well, but I prioritized finding something reliable with built in Wi-Fi and Bluetooth over just pure aesthetics this time around.

Team red.

The motherboard gets completely covered up by the air cooler anyway. Do those white heatsink covers do anything? Probably not.

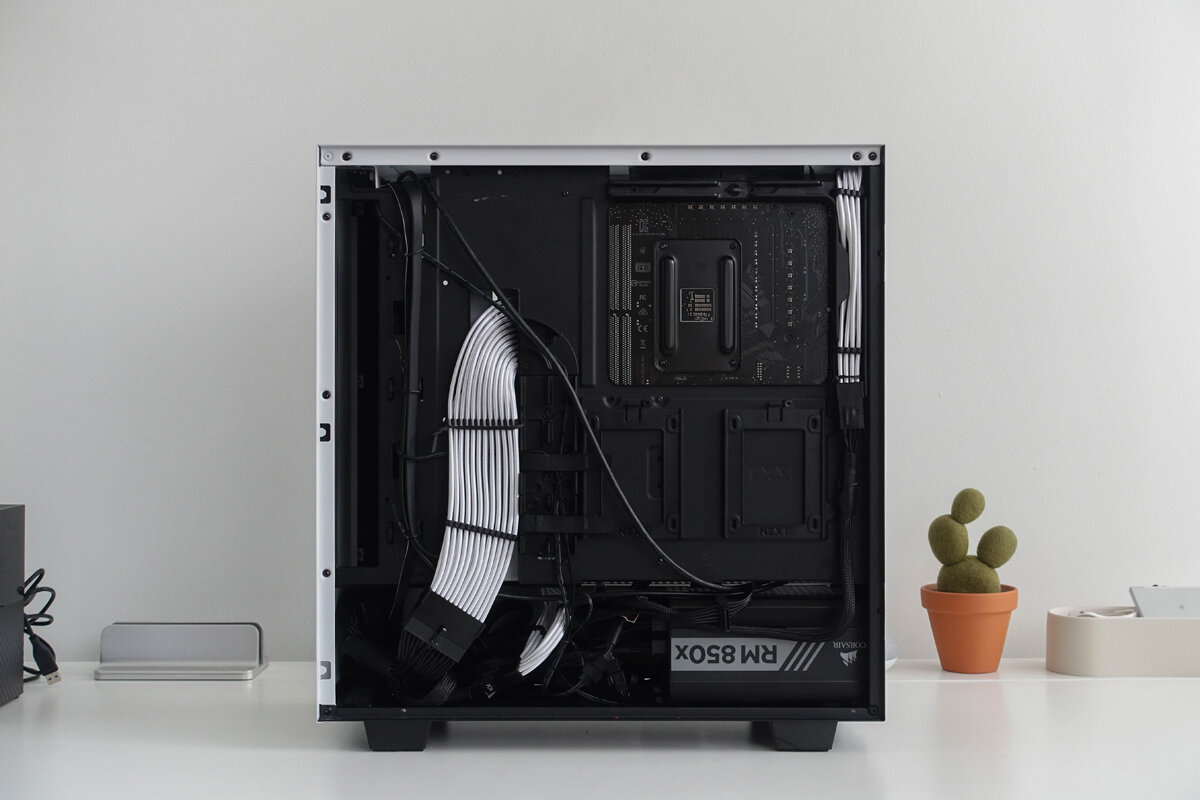
Spent a long time finessing the cable management, probably redid it 2 or 3 times before I got it to its current state.


Tried my best to make cable management look good from the back as well as the front.
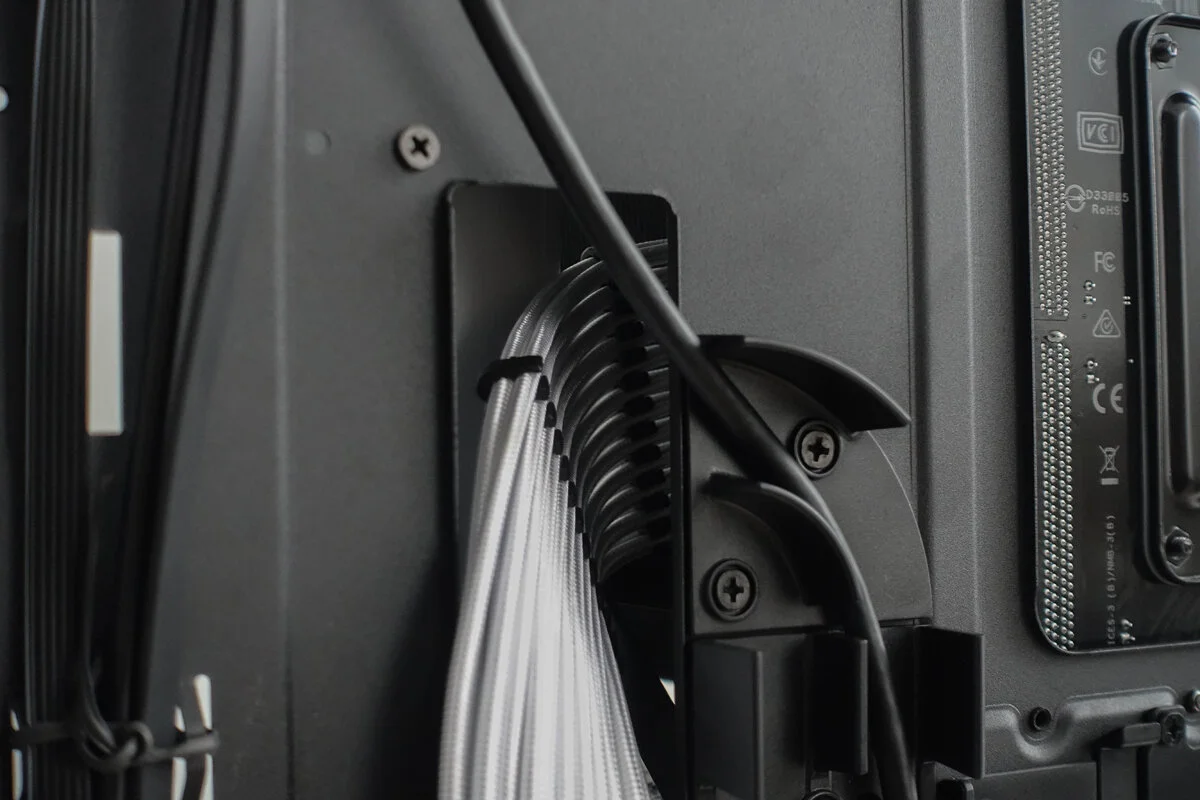
White cable extensions + cable combs = perfection.

The one cable you see awkwardly snaking its way across from the top left to the bottom right is for the front I/O USB-C port. My motherboard didn’t support it natively so I had to get an extra PCIe card for it to plug into, it just barely reaches it.

This is only gamer-looking part of the whole build and it’s the Wi-Fi and Bluetooth antenna that came with the motherboard. You can’t win them all.

The front.
And around the back.

I probably should’ve found something more colour accurate, but I just went with Wirecutter’s recommendation for a 27” 4K monitor from HP, the Z27.

The sharp blockiness of the whole thing compliments the computer case nicely.

Hatched venting on the top.

The entire LCD panel is almost entirely flat, except for this bottom bezel.

Decent selection of ports. You can push video to this monitor over USB-C, but if you do you lose access to the rest of the USB ports on the monitor which functions as a hub. I wish I HP let me do both (use USB-C for video, and attach another to use the other ports) but right now I’m stuck with using DisplayPort for video output.

The usual bottom facing buttons you have to feel for as you press through the on-screen menu.

I also picked up these Logitech Z200 speakers. Nothing fancy, but they match and they work.


Last but not least, brand new keyboard.


Fancy presentation, same old unifying receiver.
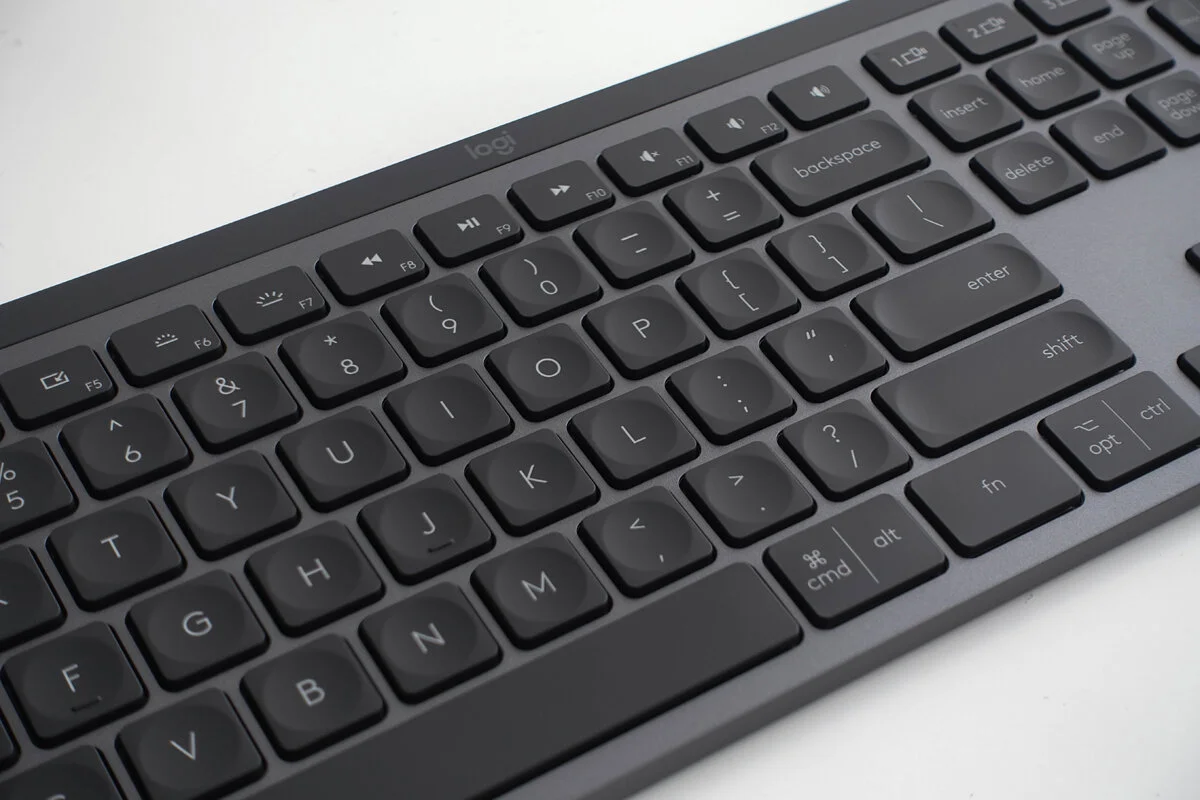
The concave keycaps are definitely noticeable at first, but you get used to them quickly. I’m no keyboard afficionado, but I would describe the overall typing experience on the MX Keys to be fairly soft.


Compared to my Surface Book’s laptop keyboard, I find I miss the hard snappiness of Microsoft’s keycaps/switches, but the expanded spacing and real numpad make the MX Keys a real productivity booster.

USB-C all the things.
